Deploying Containers in AWS Fargate using Terraform - Part 2
CloudWatch Logs and Roles
Now that we know how to execute terraform basic commands and have our project set up properly, we’ll add the rest of the components.
main.tf
Log Group in CloudWatch so we can see a log on what is happening in our container:
# CloudWatch Log Group
resource "aws_cloudwatch_log_group" "log_group" {
  name = "${var.prefix}-log-group"
  tags = merge(var.tags, {
    "Name" = "${var.prefix}-log-group",
  })
}
ECS Task Role https://docs.aws.amazon.com/AmazonECS/latest/userguide/task-iam-roles.html
# ECS Task Role
resource "aws_iam_role" "taskexecution_role" {
  name        = "${var.prefix}-ecs-taskexecution-role"
  description = "Role to ECS Task"

  assume_role_policy = data.aws_iam_policy_document.ecstask_assume_role.json

  tags = merge(var.tags, {
    "Name" = "${var.prefix}-ecs-taskexecution-role",
  })
}

# ECS Assume Role Policy Document
data "aws_iam_policy_document" "ecstask_assume_role" {
  statement {
    sid    = ""
    effect = "Allow"
    actions = [
      "sts:AssumeRole",
    ]
    principals {
      type        = "Service"
      identifiers = ["ecs-tasks.amazonaws.com"]
    }
  }
}
We attach the AmazonECSTaskExecutionRolePolicy policy so our task can download the image from ECR and add logs into CloudWatch:
- ecr:GetAuthorizationToken
- ecr:BatchCheckLayerAvailability
- ecr:GetDownloadUrlForLayer
- ecr:BatchGetImage
- logs:CreateLogStream
- logs:PutLogEvents
# Attach AmazonECSTaskExecutionRolePolicy
resource "aws_iam_role_policy_attachment" "ECSTaskExecutionRolePolicy" {
  policy_arn = "arn:aws:iam::aws:policy/service-role/AmazonECSTaskExecutionRolePolicy"
  role       = aws_iam_role.taskexecution_role.name
}
Security Group
A security group acts as a virtual firewall for your instance to control inbound and outbound traffic. In this example we are allowing incoming traffic to port 80, since this is the port used by our container (Apache)
# Task Security Group
resource "aws_security_group" "task-sg" {
  name        = "${var.prefix}-task-sg"
  description = "Security Group to allow connections to port 80"
  vpc_id      = var.vpcid

  tags = merge(var.tags, {
    "Name" = "${var.prefix}-task-sg",
  })

  ingress {
    from_port   = 80
    to_port     = 80
    protocol    = "tcp"
    cidr_blocks = ["0.0.0.0/0"]
  }

  egress {
    from_port   = 0
    to_port     = 0
    protocol    = "-1"
    cidr_blocks = ["0.0.0.0/0"]
  }
}
ECS Task Definition
The task definition describes how our task should be provisioned:
# ECS Task Definition
resource "aws_ecs_task_definition" "task" {
  family             = "${var.prefix}-task-definition"
  network_mode       = "awsvpc"
  execution_role_arn = aws_iam_role.taskexecution_role.arn
  task_role_arn      = aws_iam_role.taskexecution_role.arn

  tags = merge(var.tags, {
    "Name" = "${var.prefix}-task-definition"
  })

  container_definitions    = <<DEFINITION
  [
    {
      "name": "myweb",
      "image": "${var.ecr_image}",
      "portMappings": [
        {
            "containerPort": 80,
            "hostPort": 80
        }
      ],
      "logConfiguration": {
      "logDriver": "awslogs",
        "options": {
            "awslogs-group": "${aws_cloudwatch_log_group.log_group.name}",
            "awslogs-region": "${var.region}",
            "awslogs-stream-prefix": "awslogs-myweb"
        }
      }
    }
  ]
  DEFINITION
  requires_compatibilities = ["FARGATE"]
  cpu                      = 256
  memory                   = 512
}
You can see a description of the parameters here https://docs.aws.amazon.com/AmazonECS/latest/developerguide/task_definition_parameters.html
| CPU value | Memory value (MiB) |
|---|---|
| 256 (.25 vCPU) | 0.5GB, 1GB, and 2GB |
| 512 (.5 vCPU) | Min. 1GB and Max. 4GB, in 1GB increments |
| 1024 (1 vCPU) | Min. 2GB and Max. 8GB, in 1GB increments |
| 2048 (2 vCPU) | Min. 4GB and Max. 16GB, in 1GB increments |
| 4096 (4 vCPU) | Min. 8GB and Max. 30GB, in 1GB increments |
Fargate pricing is based on requested vCPU & memory: https://aws.amazon.com/fargate/pricing/
ECS Service
The service this will be our last resource for this initial version:
# ECS Service
resource "aws_ecs_service" "service" {
  name            = "${var.prefix}-service"
  cluster         = aws_ecs_cluster.cluster.id
  task_definition = aws_ecs_task_definition.task.arn
  desired_count   = 1
  launch_type     = "FARGATE"

  network_configuration {
    subnets          = [var.subnet]
    security_groups  = [aws_security_group.task-sg.id]
    assign_public_ip = true
  }
}
Let’s run terraform again:
terraform apply --auto-approve
If everything works as expected, we’ll see:
Apply complete! Resources: 7 added, 0 changed, 0 destroyed.
Notice that if you have been running terraform during the example you might see different numbers.
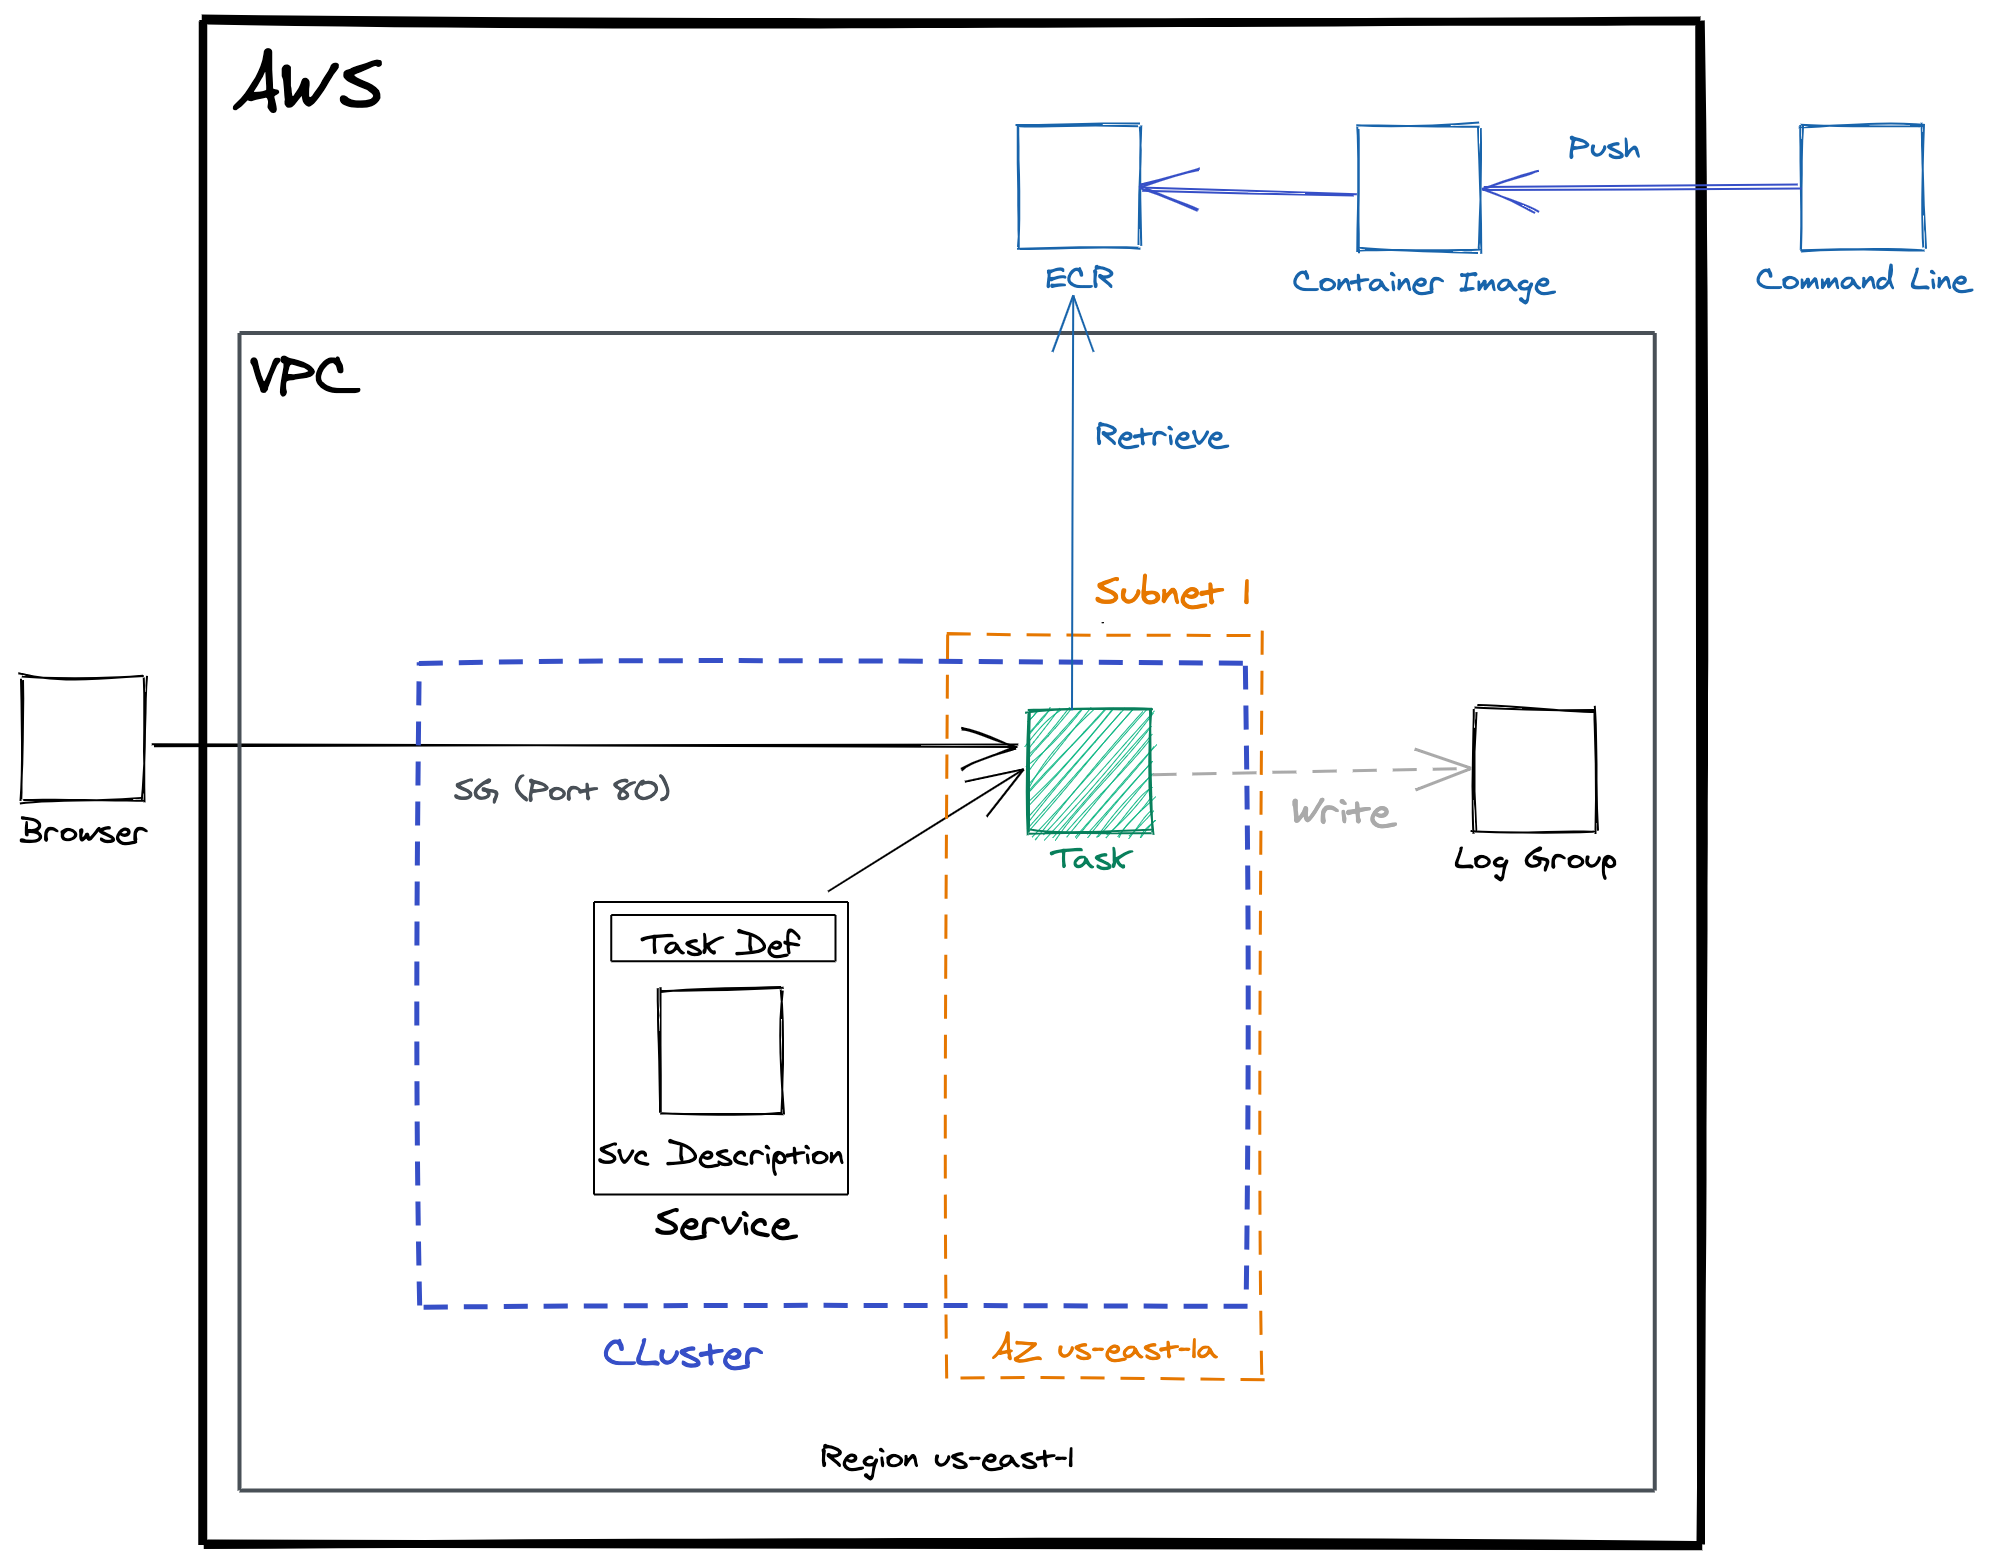
Let’s look at the resources created in the AWS Console
We’ll start going to the AWS Console and ECS, we should see our Cluster with one service and one task (notice that the task might still be pending)
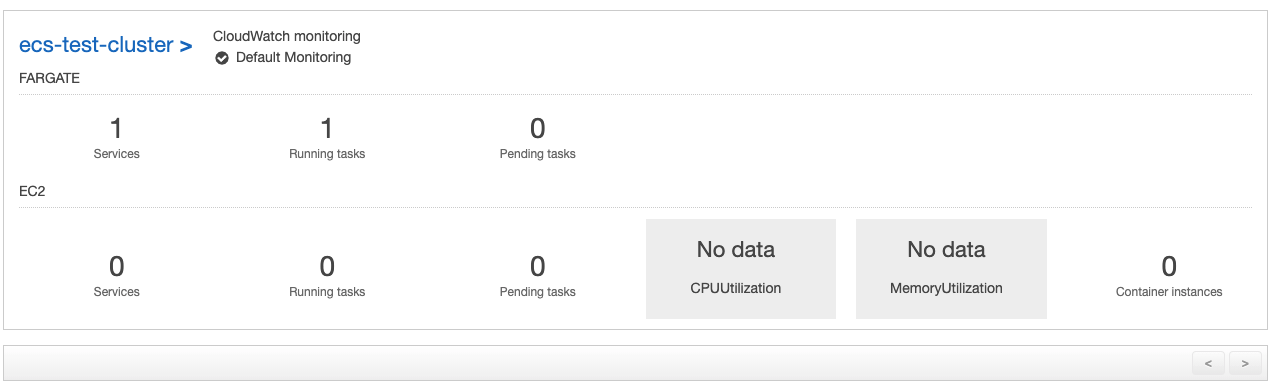
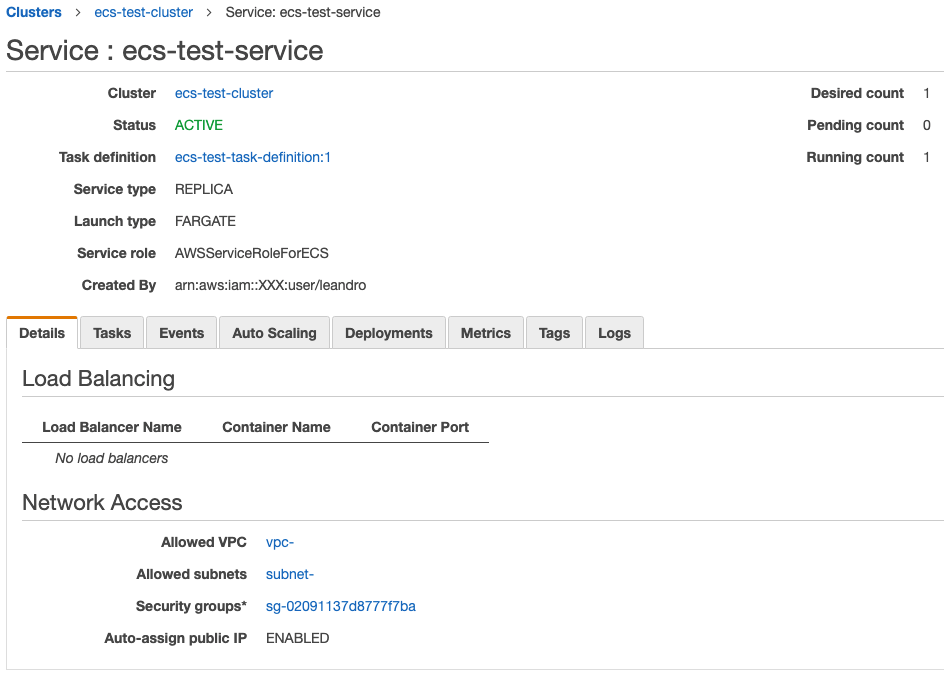
If we click on our cluster, the first tab will display information about the Service.
We can see here the name of the service and the task definition being used to launch tasks.
The quantity of tasks running should be 1, since this 1 is the value assigned to desired count in the service.
If your task is not starting, see below My task fails to start for tips on how to troubleshoot.
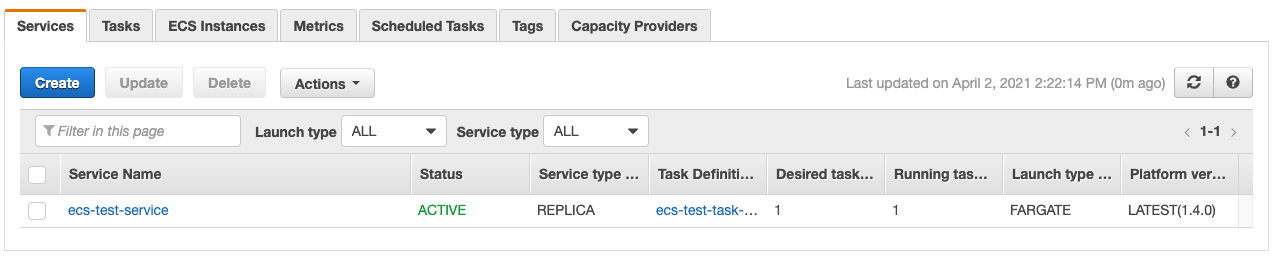
Click on the service name ecs-test-service:
Switch to the Tasks tab and click the task:
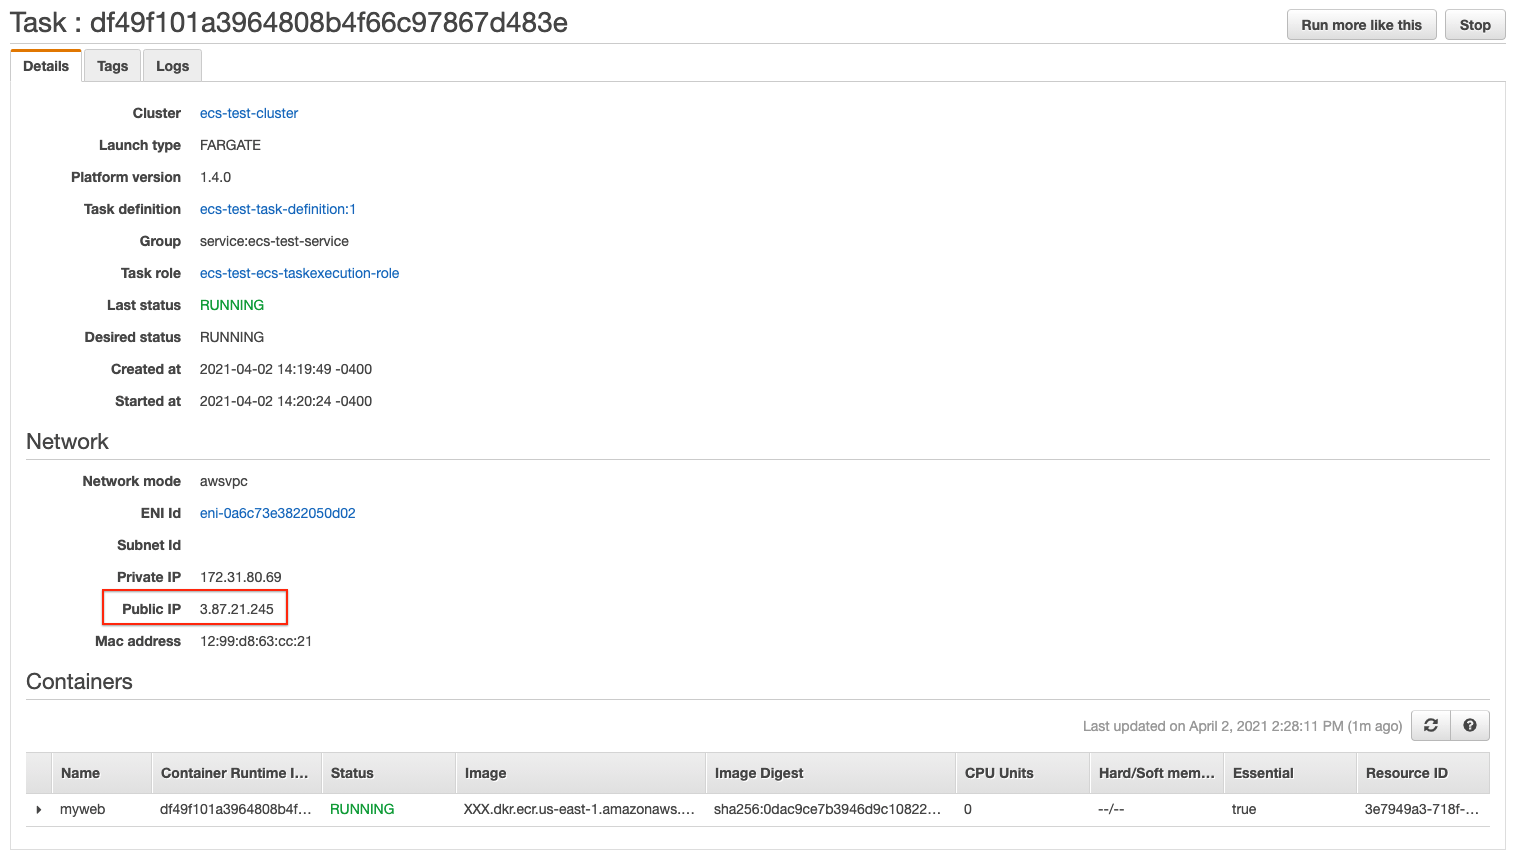
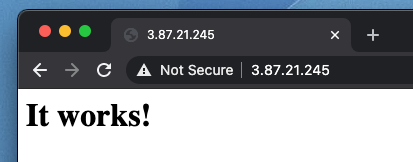
If you type the Public IP in your browser, you should be able to see the website working:
Notice that if by some reason the Task get restarted, the public IP will change.
We can see this by manually stopping the task:
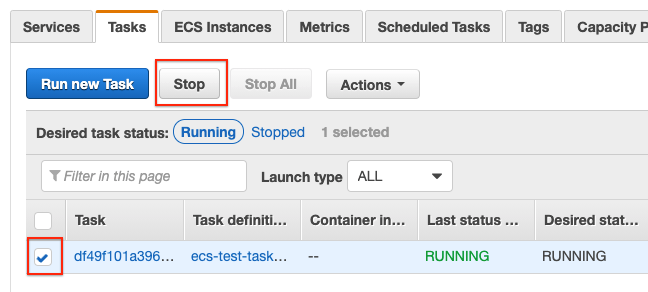
Once stopped, the service will take care of launching a new task for us.
One solution to this IP changing problem is to use Amazon ECS Service Discovery, which makes it possible for an ECS service to automatically register itself with a predictable and friendly DNS name in Amazon Route 53
My task fails to start
If after a couple of seconds, you don’t see the task running or constantly restarting is it possible that there is something wrong.
There is a couple of places you can look for to troubleshoot what’s going on.
If you see the task in the list, you can click the task to go to the details:
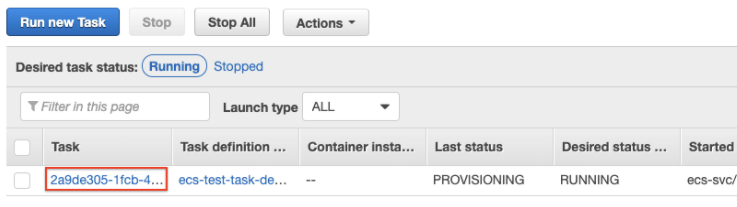
Alternatively, you can click on Stopped to see stopped tasks and click from there:
Once in the details:
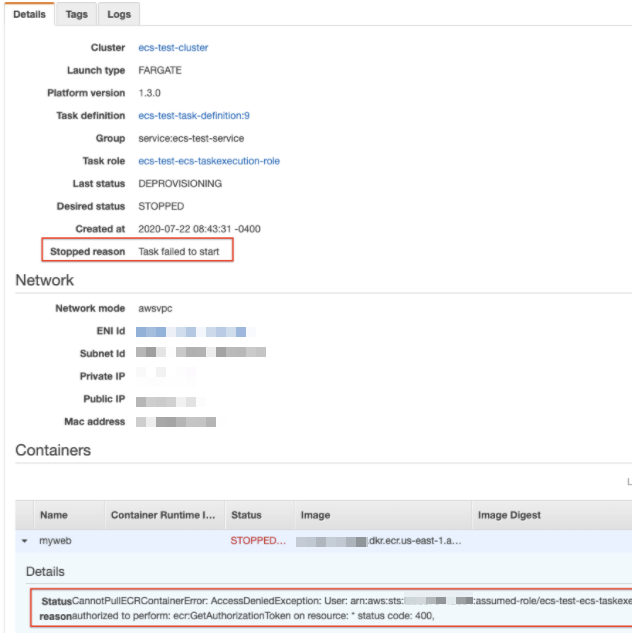
In this case the Stopped reason: Task failed to start is not helpful, but the Status reason is:
CannotPullECRContainerError: AccessDeniedException: User: arn:aws:sts::XXX:assumed-role/ecs-test-ecs-taskexecution-role/304803f7-b6e4-44ac-b5a4-799e88c1994f is not authorized to perform: ecr:GetAuthorizationToken on resource: * status code: 400,
(In this case I removed the policy from the role to purposely make the task fail)
Another common error is:
CannotPullContainerError: Error response from daemon: Get https://XXX.dkr.ecr.us-east-1.amazonaws.com/v2/: net/http: request canceled while waiting for connection (Client.Timeout exceeded while awaiting headers)
To address this, confirm that the subnet used to run a task has a route to an internet gateway or NAT gateway in a route table. For more information on this error check https://aws.amazon.com/premiumsupport/knowledge-center/ecs-pull-container-error/
Another great place to look for errors, especially if they are related with the container is in CloudWatch Logs.
CloudWatch Logs
You can see the logs going to CloudWatch, or by expanding the container row and clicking View logs in CloudWatch link.
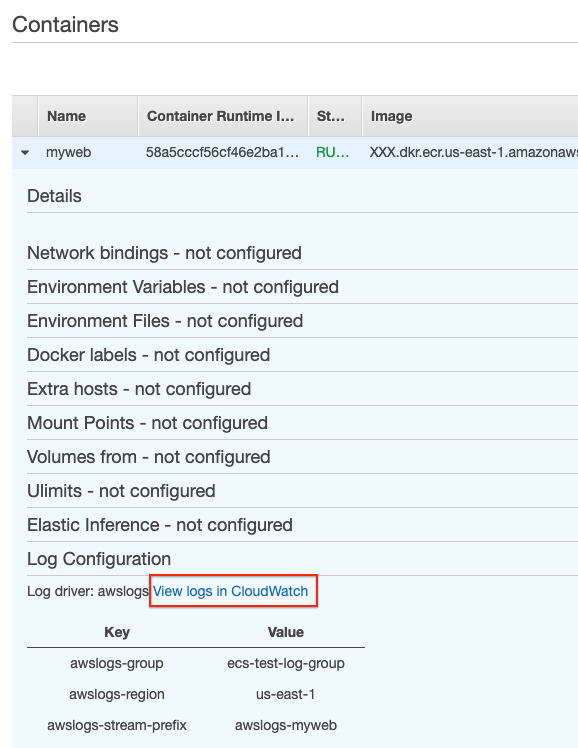
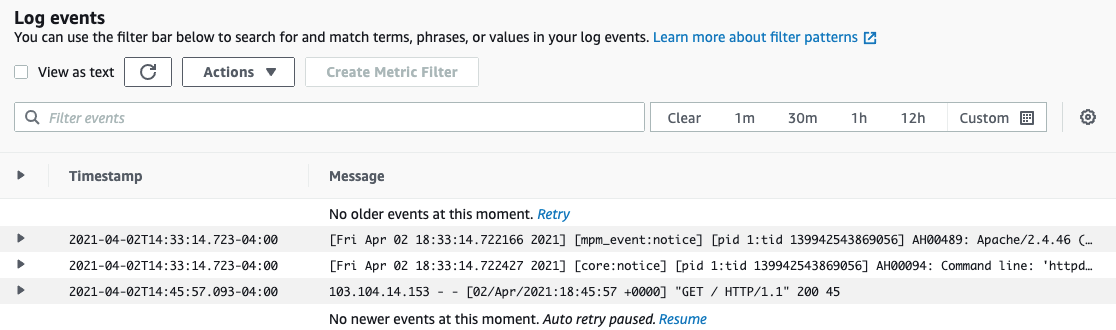
This is very useful if your container is failing to start or having a non-expected behavior.
What we did so far
What’s next?
In the next article I’ll show how to add a Load balancer and application auto scaling.